
Early on with our van we had battery issues, luckily we also have a 2005 beetle so on the mornings when we found the battery was flat we could jump start. We we not surprised by this as it had been sitting on a drive for a few months and had had a flat battery prior to us buying it.
Before we replaced the battery we realised that the hazard lights were setting off after we had turned off the engine and this was actually the main cause for the battery going flat regularly. This was confirmed by our breakdown company….the hazard relay indicator needed changing.
We could have taken a trip to the garage, but having just bought the van money was tight so I started researching whether I could do the job myself. It was a really simple job that took somewhere in the region of 1 – 1.5 hours (with no experience) and cost about £20.
GETTING THE PARTS
I wanted to make sure I had the right part so I bought a hazard indicator relay switch from JustKampers. Armed with this and a Phillips screwdriver I set to work.
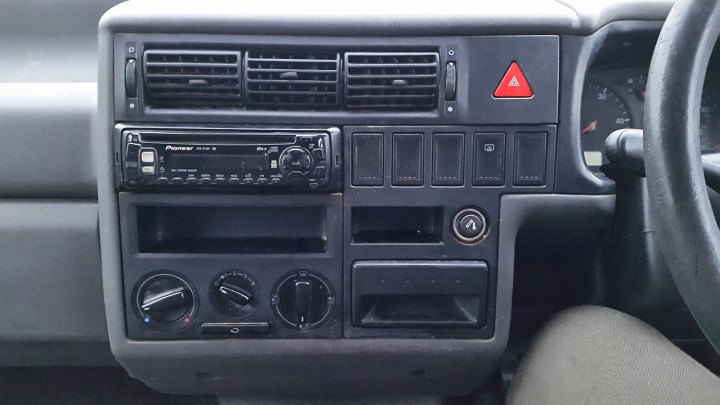
REMOVE THE DASHBOARD PANEL
We want to remove and replace the hazard indicator switch. to do this on a T4 the whole to segment of the panel needs to be removed.
First remove the air vents. These have literately just pull out in three individual parts.
Once the three air vents are out there are a number of screws which run along the top and bottom – as show in the images below.


One the screws are out (and put somewhere safe!) you can simply pull the whole of the front of the panel out easily.


REMOVING THE HAZARD INDICATOR RELAY SWITCH
Now I really struggled to figure out how to remove the actual hazard indicator relay button and ended up breaking it in half! Don’t panic if this happens to you, you’ll be replacing the whole unit so it’s not an issue.


I’m not sure why my unit looks blue in the picture above, but it does help show what you are trying to grab hold of if you look behind the dashboard panel. The hazard indicator relay switch does not pull out of the dashboard. Instead PUSH it (and pull on the bit the looks blue in the above picture) backwards into the dashboard.
The hazard indicator relay switch can then be brought out via the adjacent gap, as in the image below.
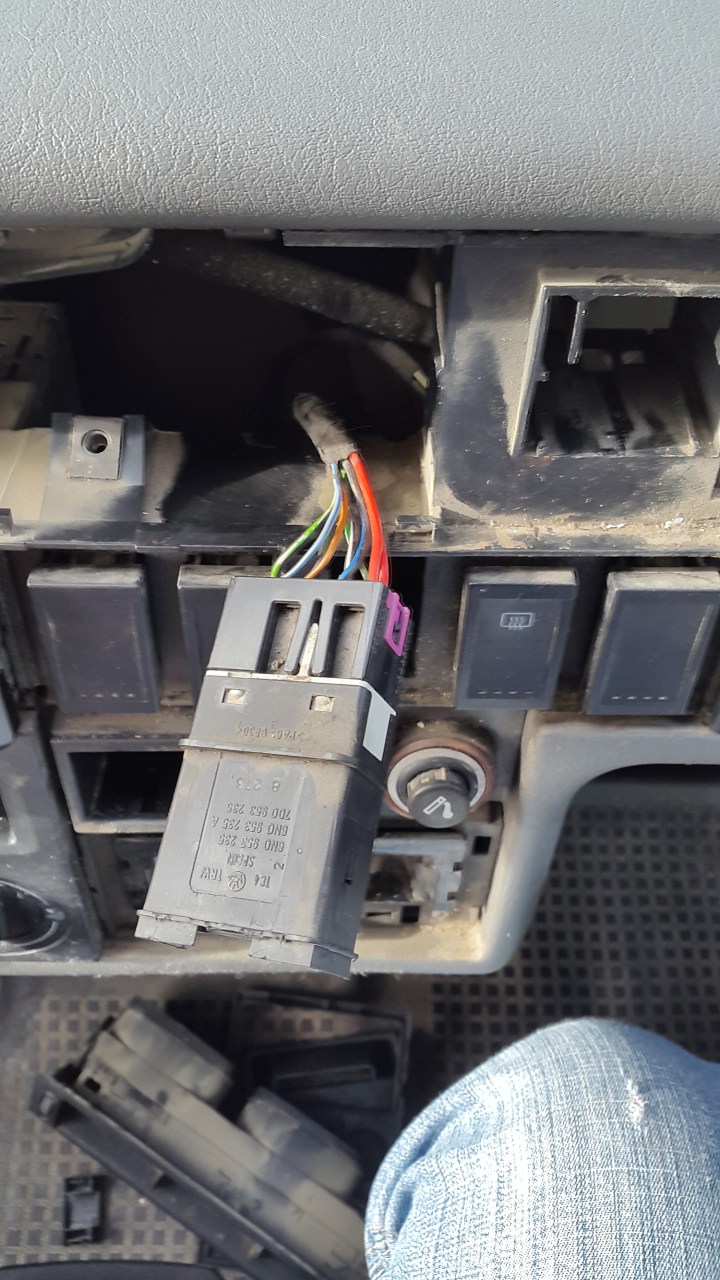
What you can see in the image above is the main socket for the hazard indicator relay switch. The switch itself has been removed – remember I had broken mine into bits by this point!
REPLACE THE HAZARD INDICATOR RELAY SWITCH
The hazard indicator relay switch comes as a full unit, so at this point you can now simply clip it into the base socket. The connectors and clips are shown in the images below for your reference.


RETURN THE VAN TO NORMAL
Once you are all pugged in it is worth checking that your indicator lights are still working as expected. Then reverse all the steps above to get your switch and dashboard back into place.
That should be you all set. But remember constant and rapid drain can damage batteries. We did have to replace the engine battery too. No problems since though at all!
